Get help with how to set up your files for printing, laser cutting, and etching and label printing and cutting by following the instructions below.
Setup file to print with a bleed
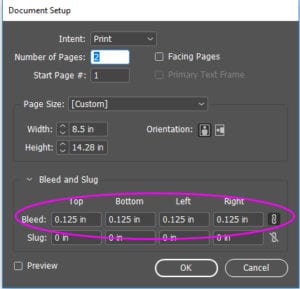
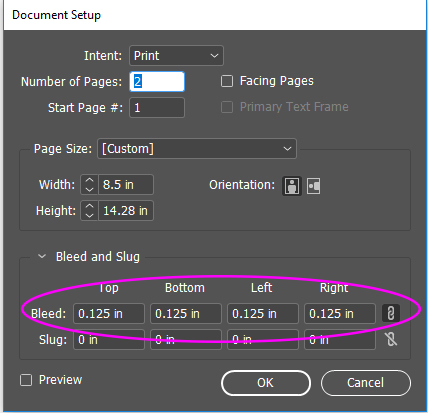
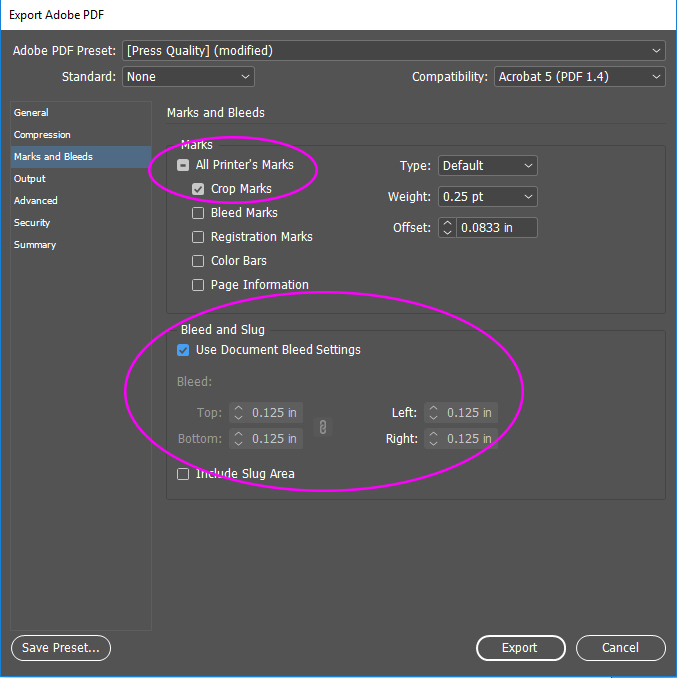
- Make sure your document has .125 bleed on it
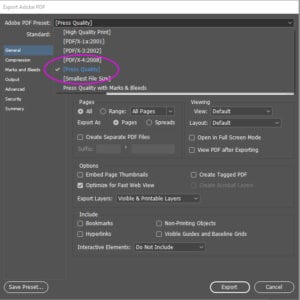
- When Exporting or Saving as a PDF select “Press Quality”
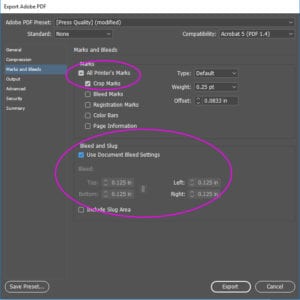
- When Exporting or Saving as a PDF make sure you include the bleed and crop

Setup file to print with specialty colors
- GOLD TONER SETUP
1. Import vector objects, draw and fill a shape, or select text that will have the Gold Dry Ink applied in Adobe® Illustrator®.
2. Add a new layer and name it Gold. Cut and paste your objects to that layer.
3. Add PANTONE® 871C Gold to your file. Designate it as a spot color and name it “Gold”.
4. Select the objects in your layer and fill them with the Gold color. If the objects will be placed on top of a photograph or field of color and you do not want the background to show through, select Knockout Group. Save your file as an EPS for placement in Adobe® InDesign® using the standard settings for EPS export. Or save the Illustrator PDF using the press quality setting.
Tip: Set the gold as 65% to make it look more shimmery - WHITE TONER SETUP
1. Import vector objects, draw and fill a shape, or select text that will have the White Dry Ink applied in Adobe® Illustrator®.
2. Add a new layer and name it White. Cut and paste your objects to that layer.
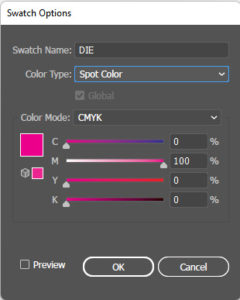
3. Add swatch 100% Cyan to your file. Designate it as a spot color and name it “White”.
4. Select the objects in your layer and fill them with the White color. If the objects will be placed on top of a photograph or field of color and you do not want the background to show through, select Knockout Group. Save your file as an EPS for placement in Adobe® InDesign® using the standard settings for EPS export. Or save the Illustrator PDF using the press quality setting.
Creating a pdf file for label printing
- Give the art a .0625 bleed
- The die should have a stroke of 1pt and no fill. Set it up as a spot color named “DIE”.
- Save as “Press Quality” PDF with the bleeds included.
Creating files for laser cutting
- Create a separate layer named “DIE” add the die into that layer
- The die should be a stoke with a weight of .01pt and black. No fill
- When saving the PDF save it with layers

